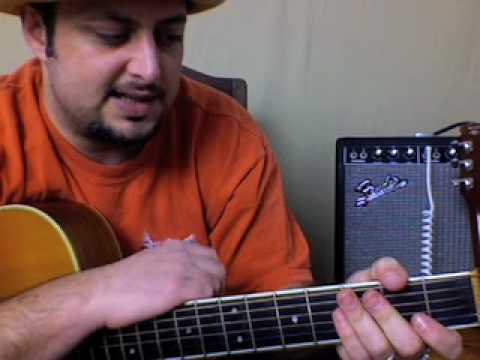
This Smells Like Teen Spirit guitar lesson breaks down one of the most iconic grunge anthems ever recorded. Kurt Cobain’s raw power chord progression might seem simple at first, but there’s a specific attitude and technique that makes this song explode with energy. You’ll work on palm muting, power chord transitions, and that distinctive grunge tone that defined a generation. The chord changes move quickly between verses and the explosive chorus, making this a perfect intermediate challenge that will push your rhythm playing to the next level.

The Song That Changed Everything
Recorded in 1991 at Sound City Studios, “Smells Like Teen Spirit” started as a simple chord progression Kurt Cobain wrote after listening to the Pixies’ quiet-loud-quiet dynamics. Producer Butch Vig layered multiple guitar tracks to create that wall of sound, with Cobain playing a Fender Mustang through a Mesa/Boogie amplifier. The song’s explosive success caught the band completely off guard, catapulting them from underground darlings to reluctant superstars overnight.
What makes this song so compelling to play is Cobain’s approach to guitar. He wasn’t technically flashy, but his sense of dynamics and raw emotion created something that resonated with millions. The contrast between the muted, almost mumbled verses and the screaming chorus gives you a masterclass in musical tension and release.
What You’ll Learn
- Power chord transitions between F, Bb, Ab, and Db
- Palm muting technique for that chunky verse sound
- Dynamic contrast between quiet verses and explosive choruses
- Down-picking stamina for maintaining consistent attack
- String muting to keep unwanted noise under control
- How to create space and tension with rhythm guitar
Chord Progression Breakdown
The main progression uses four power chords: F5, Bb5, Ab5, and Db5. Start with your F5 on the first fret of the low E string, using your index finger for the root note and your ring finger on the third fret of the A string. This fingering pattern stays consistent as you move up the neck.
For the Bb5, slide that same shape up to the sixth fret. The Ab5 sits on the fourth fret, and the Db5 lands on the ninth fret. The key is keeping your wrist straight and your thumb positioned behind the neck for support. Don’t grip too hard with your fretting hand or you’ll tire out quickly during the faster sections.
Watch your muting technique between chord changes. Rest your palm lightly on the strings near the bridge to control the sustain during the verses. When you hit the chorus, lift that palm slightly to let the chords ring out with full power. The contrast between these two approaches creates the song’s signature dynamic.
The progression follows a simple pattern: F5-Bb5-Ab5-Db5, but the magic happens in the timing and intensity. During verses, play each chord for four beats with heavy palm muting. In the chorus, the same chords get more aggressive strumming and longer sustain.
Common Fingering Issues
Many guitarists struggle with the stretch to reach the Db5 on the ninth fret, especially when coming from the Ab5 on the fourth fret. Practice this transition slowly, keeping your thumb anchored behind the neck. If you’re having trouble reaching, check that your guitar strap height allows your fretting hand to move freely without straining.
Another common problem is accidentally hitting open strings during the chord changes. Keep your unused fingers lightly touching the strings they’re not fretting to prevent unwanted noise. This becomes crucial when you’re playing with distortion, which amplifies every little mistake.
Strumming Pattern & Rhythm
The verses use a straightforward down-picking pattern with heavy palm muting. Count “one, two, three, four” and strike each chord on the beat. The palm muting creates that chunky, percussive sound that keeps the verse section tight and controlled. Keep your picking hand relaxed and let the pick bounce slightly off the strings after each strike.
When the chorus hits, everything changes. Remove the palm muting and attack the strings with more force. The strumming becomes more aggressive, with additional strums between the main beats. Think of it as unleashing all that tension you built up during the verse.
Practice the dynamic shift between sections by playing the verse progression with palm muting for eight bars, then switching to the open chorus sound for eight bars. This exercise helps you internalize the contrast that makes the song so powerful. Your right hand needs to automatically adjust between the muted and open techniques.
Down-picking throughout the entire song builds stamina and gives you that consistent attack Cobain used. Alternate picking works too, but down-picking has a chunkier, more aggressive sound that fits the grunge aesthetic better. Start slowly and build up your endurance gradually.
Tips for Playing This Song
Start with clean tone first. Before adding distortion, practice the chord changes and palm muting with a clean guitar sound. This lets you hear every detail of your technique and catch mistakes before they get buried under gain. Once you’re comfortable, add distortion gradually until you find that sweet spot between clarity and aggression.
Focus on the transitions. The hardest part isn’t the individual chords but moving between them smoothly while maintaining the rhythm. Practice just the chord changes without worrying about strumming patterns. Get your fretting hand comfortable with the movements, then add the rhythm elements back in.
Use a metronome for the tempo changes. The song has subtle tempo shifts that can throw you off if you’re not careful. The verses sit back slightly while the choruses push forward. Practice with a metronome set to about 117 BPM to keep yourself honest about the timing.
Don’t overdo the palm muting. Rest your palm just enough to dampen the strings without killing them completely. You still want to hear the chord pitches, just with less sustain. Too much palm pressure turns everything into a muddy thump, while too little defeats the purpose of the technique.
Getting That Grunge Tone
Cobain’s tone came from cranking a Mesa/Boogie amplifier and using a Fender Mustang guitar, but you can get close with most setups. The key is finding the right balance between gain and clarity. You want enough distortion to sound aggressive without turning everything into mush.
If you’re using an amp, try setting the gain around 6 or 7, with the mids pushed up slightly and the treble backed off to avoid harshness. For pedals, a classic distortion or overdrive pedal into a clean amp works well. Experiment with your guitar’s volume knob too. Rolling it back slightly can clean up the tone while maintaining the attitude.
The most important element is your playing technique. Cobain’s power came from his attack and dynamics more than his gear. Hit the strings with conviction during the choruses and pull back during the verses. The equipment just amplifies what you’re already doing with your hands.
This song rewards players who commit fully to each section. Practice along with the video lesson until the chord changes become automatic, then focus on bringing your own energy to the performance. Cobain’s genius was taking simple elements and making them feel urgent and important.